Personalised Christmas Cards 2017

Tuesday 31 October 2017

I'm Watching You - Halloween treat jar and tags


The end of  the month is here and I am prepared for the trick or treaters who may call tonight, I have two jars filled with spooky treats and two Halloween tags.


I love making tags and these two were fun to make using distress inks, Halloween stamps and dies, and Papermilldirect black, apple green and mandarin orange card.


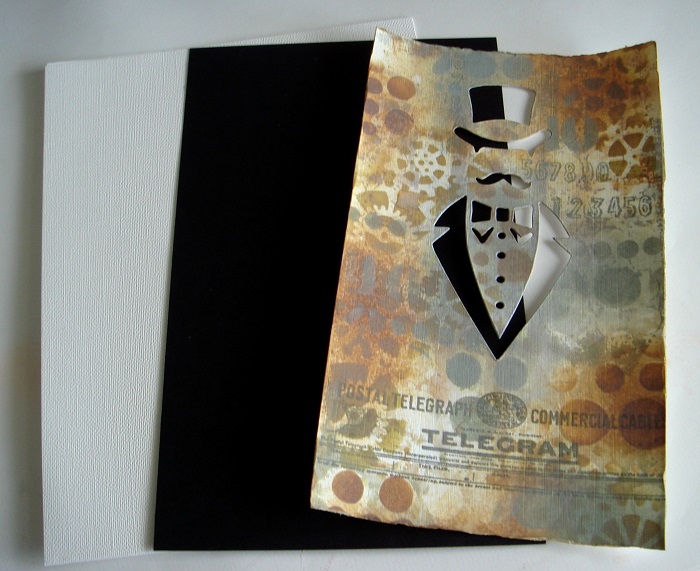
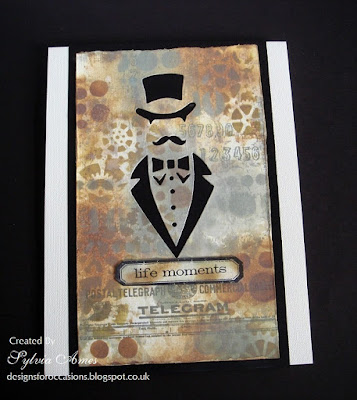
The tags were die cut, coloured with distress inks, stencilled, stamped with various Halloween stamps and decorated with die cut Halloween shapes then layered onto contrasting card.  I filled Kilner jars with sweets, trying to get the eyeballs to look outward then attached the tags with ribbon.  A nice treat for the grandchildren to share and any other callers on Halloween.


Materials used:
  • Papermilldirect black plain 250gsm, apple green plain 240gsm and mandarin plain 240gsm cardstock
  • Sizzix tim Holtz Alterations dies - Tag Collection and Trick or Treat 
  • Various Stampers Anonymous rubber stamps
  • Tim Holtz stencil Shatter
  • Ranger distress inks and distress oxides
  • Archival ink pad black
  • Kilner jar and halloween spooky treats
  • ribbon from stash 
Happy Haunting to all of you who are out with the children trick or treating tonight.

Sylv xx


Sunday 22 October 2017

Halloween Tissue and Treat Box


Another Halloween post from me today.  Two black and red boxes cut using cutting files from the Silhouette Store.


I used papermilldirect white linen 255gsm, black plain 250gsm and post box red smooth 250gsm card and cut the boxes out on the Silhouette Cameo using cutting files by Jamie Cripps and Tanya Batrak.  

I bought a square box of plain tissues and stamped a few with bats, just to make them a little more spooky.  The stamped tissues were put back into the square box of tissues and placed inside the Halloween tissue box .

Sylv xx


Thursday 19 October 2017

Have A Dapper Birthday


Hello, friends, followers and passers by.  Today I have a steampunk birthday card made for my son, using distress oxide inks, stencils, stamps and a Sizzix die.  The die was an impulse buy a long time ago and has laid unused since, this card was inspired by an article in Craft Stamper and I though the die would work well instead of a stamp. 


I used papermilldirect white linen card for the background, plain black card for layering and  white hemp for the card blank.


The background was blended with distress oxides and stencilled using Tim Holtz mini stencils, then stamped with Stampers Anonymous stamps.  The dapper die was cut out of the background and the background adhered to black card.  Stampers Anonymous simple sayings life moments was stamped, die cut and fastened to the card with sticky fixers.


The insert for the card was stencilled and a computer generated greeting added.

I love using the new distress oxides and have made another couple of similar cards for male birthdays next month.

Sylv xx

Tuesday 10 October 2017

Spooky cards For Halloween

 
I everyone, now we are into October I have started making some Halloween cards, a good time to use those spooky stamps, dies, cutting files and lovely Papermilldirect Autumn coloured cards and envelopes  I have in my craft room.

Halloween is not everyone's cup of tea but I usually make a few cards for the children, as well as some treat bags just in case anyone calls to Trick or Treat on the evening of October 31st.


Above is a card for the older children, featuring a zombie and graveyard with bats flying around a full Halloween moon.   The background was created with distress inks and the graveyard foreground was hand cut from black card with the large bat, crosses and tombstones machine cut on the Silhouette.


Orange, purple and black with fun images cut on the Silhouette were used for the not too scary cards for younger children.


Sylv xx

Tuesday 3 October 2017

How To Use Embossing Diffusers In Your Cardmaking


Hello everyone, my DT post over on the Papermilldirect blog today is a tutorial using embossing diffusers.  


I used my embossing diffusers with a Crafter's Companion  A4 embossing folder to make 4 different Christmas cards.  The white embossed panels were attached to coloured card blanks ready for making into Christmas cards.


The plain area left by the diffuser was used to stamp an image on the green card and to add a die cut sentiment to the blue card.


I used the diffuser insert to get the round embossed area for the bauble and the bottom of the red card.  The embossed area was coloured with inks, the round embossing was made into a bauble by adding a ribbon and decorating with perfect pearls.  A cute Pinkpetticoat snowman image was added to the red card with 3D sticky fixers and a sentiment stamped underneath.


All card used is from Papermilldirect, the white hopsack and white linen emboss really well.  If you want to know how to use embossing diffusers in your cardmaking my tutorial can be found HERE.

Sylv xx